Tea bags repurposed to bring hope
March 8, 2018

What started out as a hobby of taking photos soon became a personal mission: to give 100% of my photo session fees to local charities. In a span of 18 months, I raised over $9,100 for eight local non-profit organizations (check out my video recap of my sessions from 2017). And while I welcome the break from sessions that the winter months provide, I wanted to find a way to jump-start the donations for the non-profits I’m partnering with this year (The Outlet, Wooden It Be Lovely, and Refuge Ranch) instead of waiting for warmer temps and leaves on the trees.


As I was scrolling through Instagram one day, I came across some cute artwork someone had done on a tea bag. It got me thinking that something like that would be a fun, artistic way to embellish a gift, use as a bookmark or give as an encouragement to a friend, co-worker or tea lover. So, I drank up some tea, set the tea bags out to dry, emptied the leaves, dyed them and dried them again then decorated it. So, this fun mini canvas suddenly became a way for me to be creative and make money for these organizations! I began asking my friends to save their tea bags, then I posted photos on Facebook and I started getting orders. At $10 per card of 2 tea bags, I’ve been able to raise $480 in a month’s time!
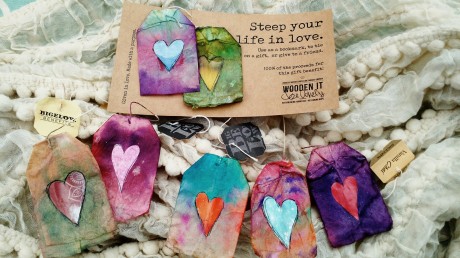
I’ve given them to the organizations to sell at their fundraisers, too. Who would’ve thought that a used tea bag that 100% of the time ends up in the trash could be repurposed as something incredibly beautiful to bring hope to those in the community! Would you like to contribute to my mission by purchasing some tea bags for a friend or yourself? Email me here.

Foil Art
August 26, 2015
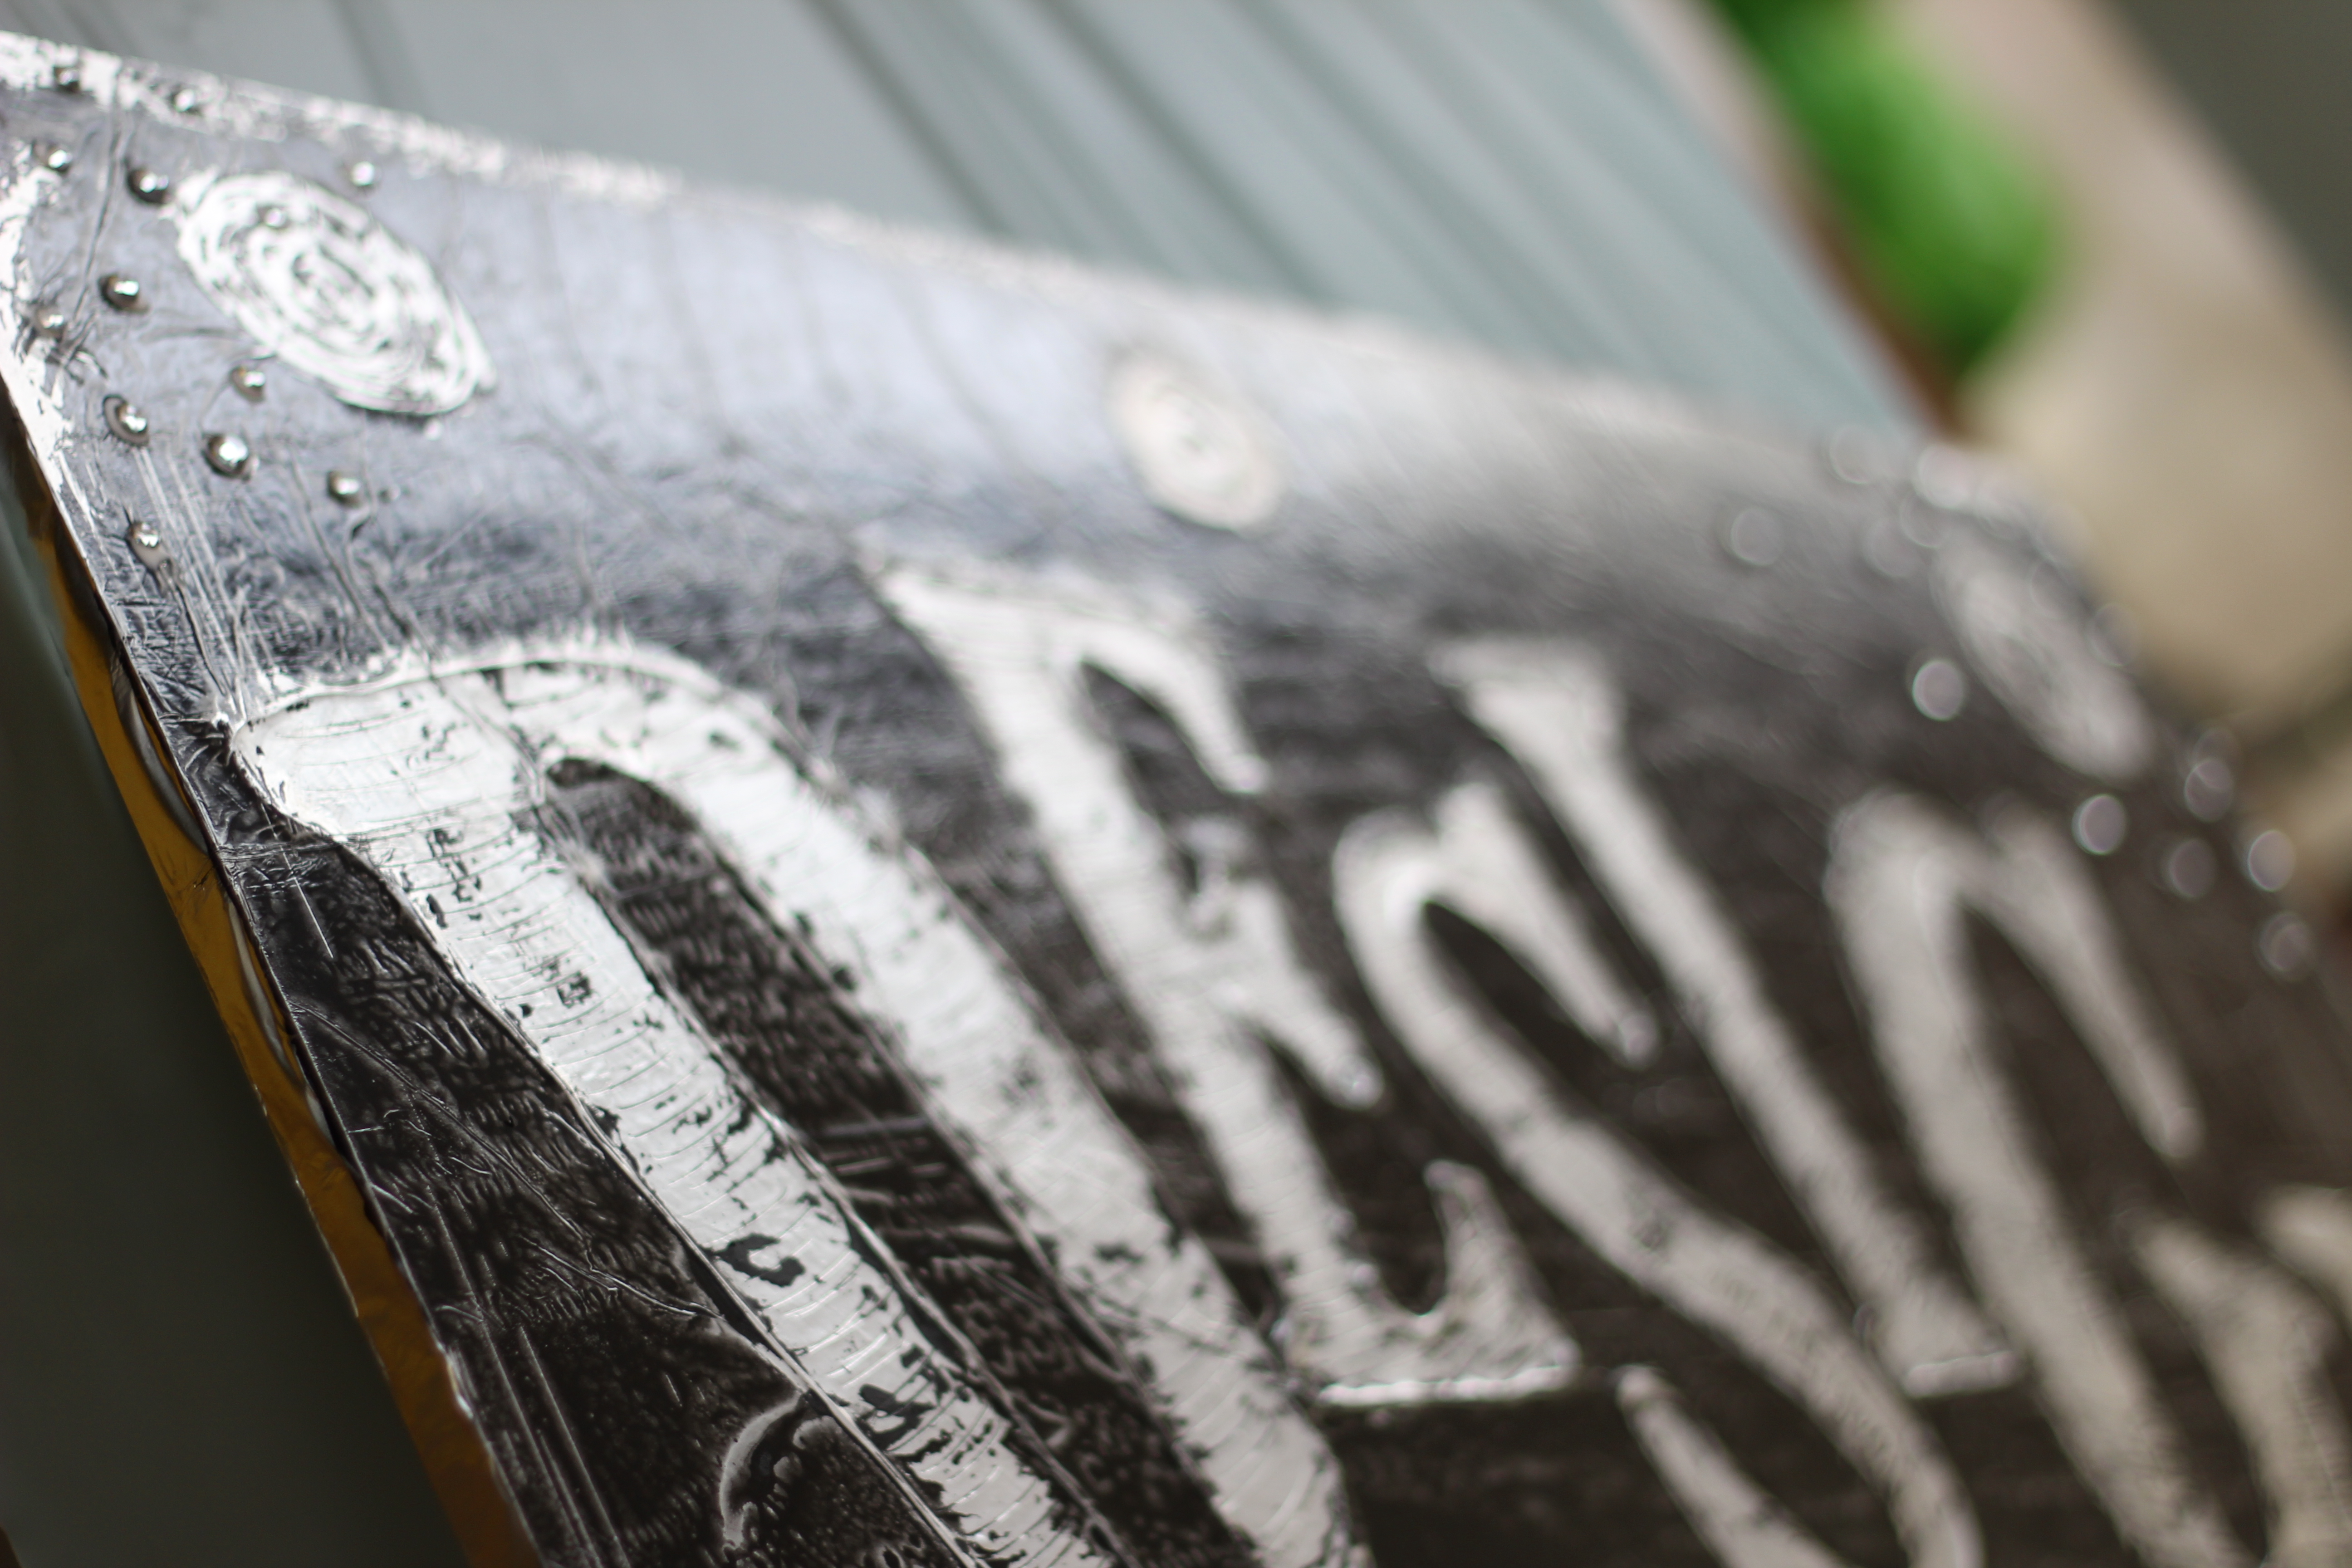
With just a few simple items, you can create beautiful pieces of art! I used black foam board (not the super cheap stuff), Aleen’s Original Tacky Glue (8oz gold bottle), aluminum foil, spray adhesive and liquid shoe polish (with the foam applicator) to create these and they turned out great!
I cut out and traced letters onto a board with pencil and used the Tacky Glue to outline it. Notice, I tested filling in the letters, but that took way too much time and drying time, and it really didn’t end up making a difference at all! This glue works much better than Elmer’s glue. It keeps its form and doesn’t spread or run like Elmer’s.
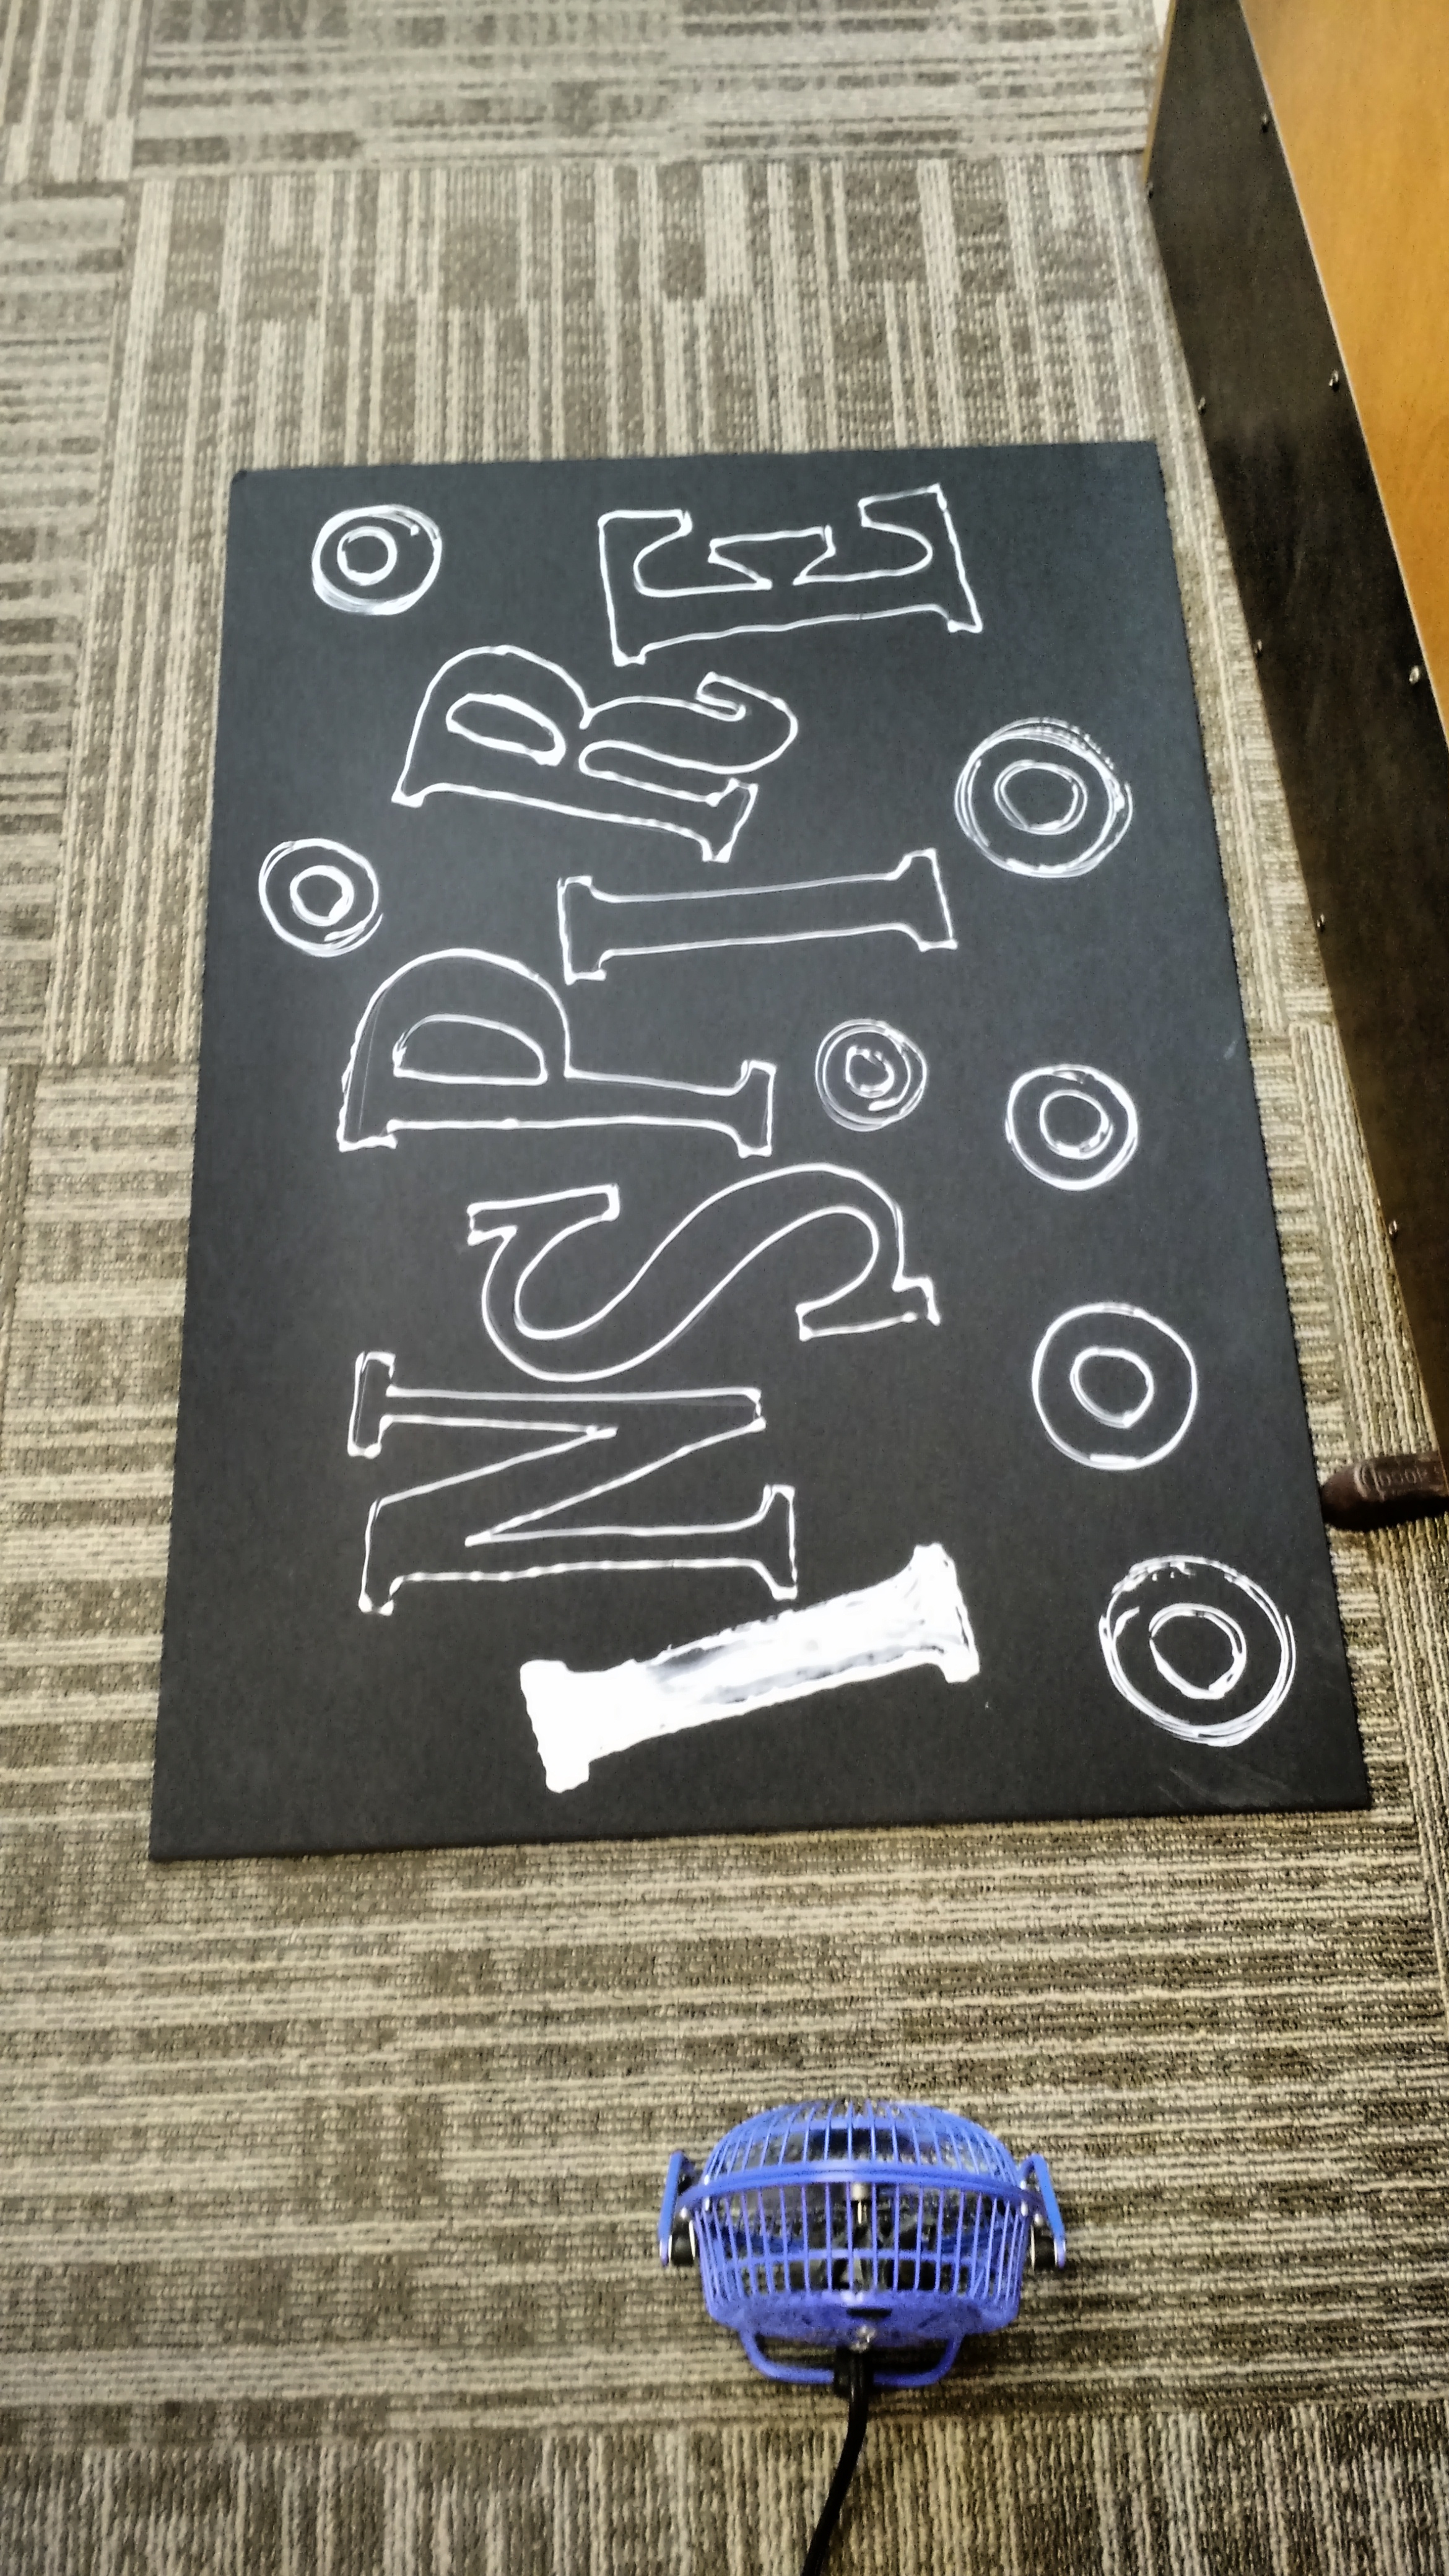
Once the glued outlined letters were dry, I took the board outside and covered it well with spray adhesive. Then I immediately placed a large sheet of aluminum foil over the board (doesn’t matter if you use dull or shiny side) and began to smooth it out, being careful not to tear the foil. I took a pencil eraser and defined the inside and outside edges of the lettering then added some doodles with a dull pencil.

Then I put shoe polish over the entire board and let it dry for about 10-15 minutes. I took a slightly damp cloth and began to lightly rub off some of the shoe polish inside of the lettering and circle doodles. Rub off as little or as much as you want.
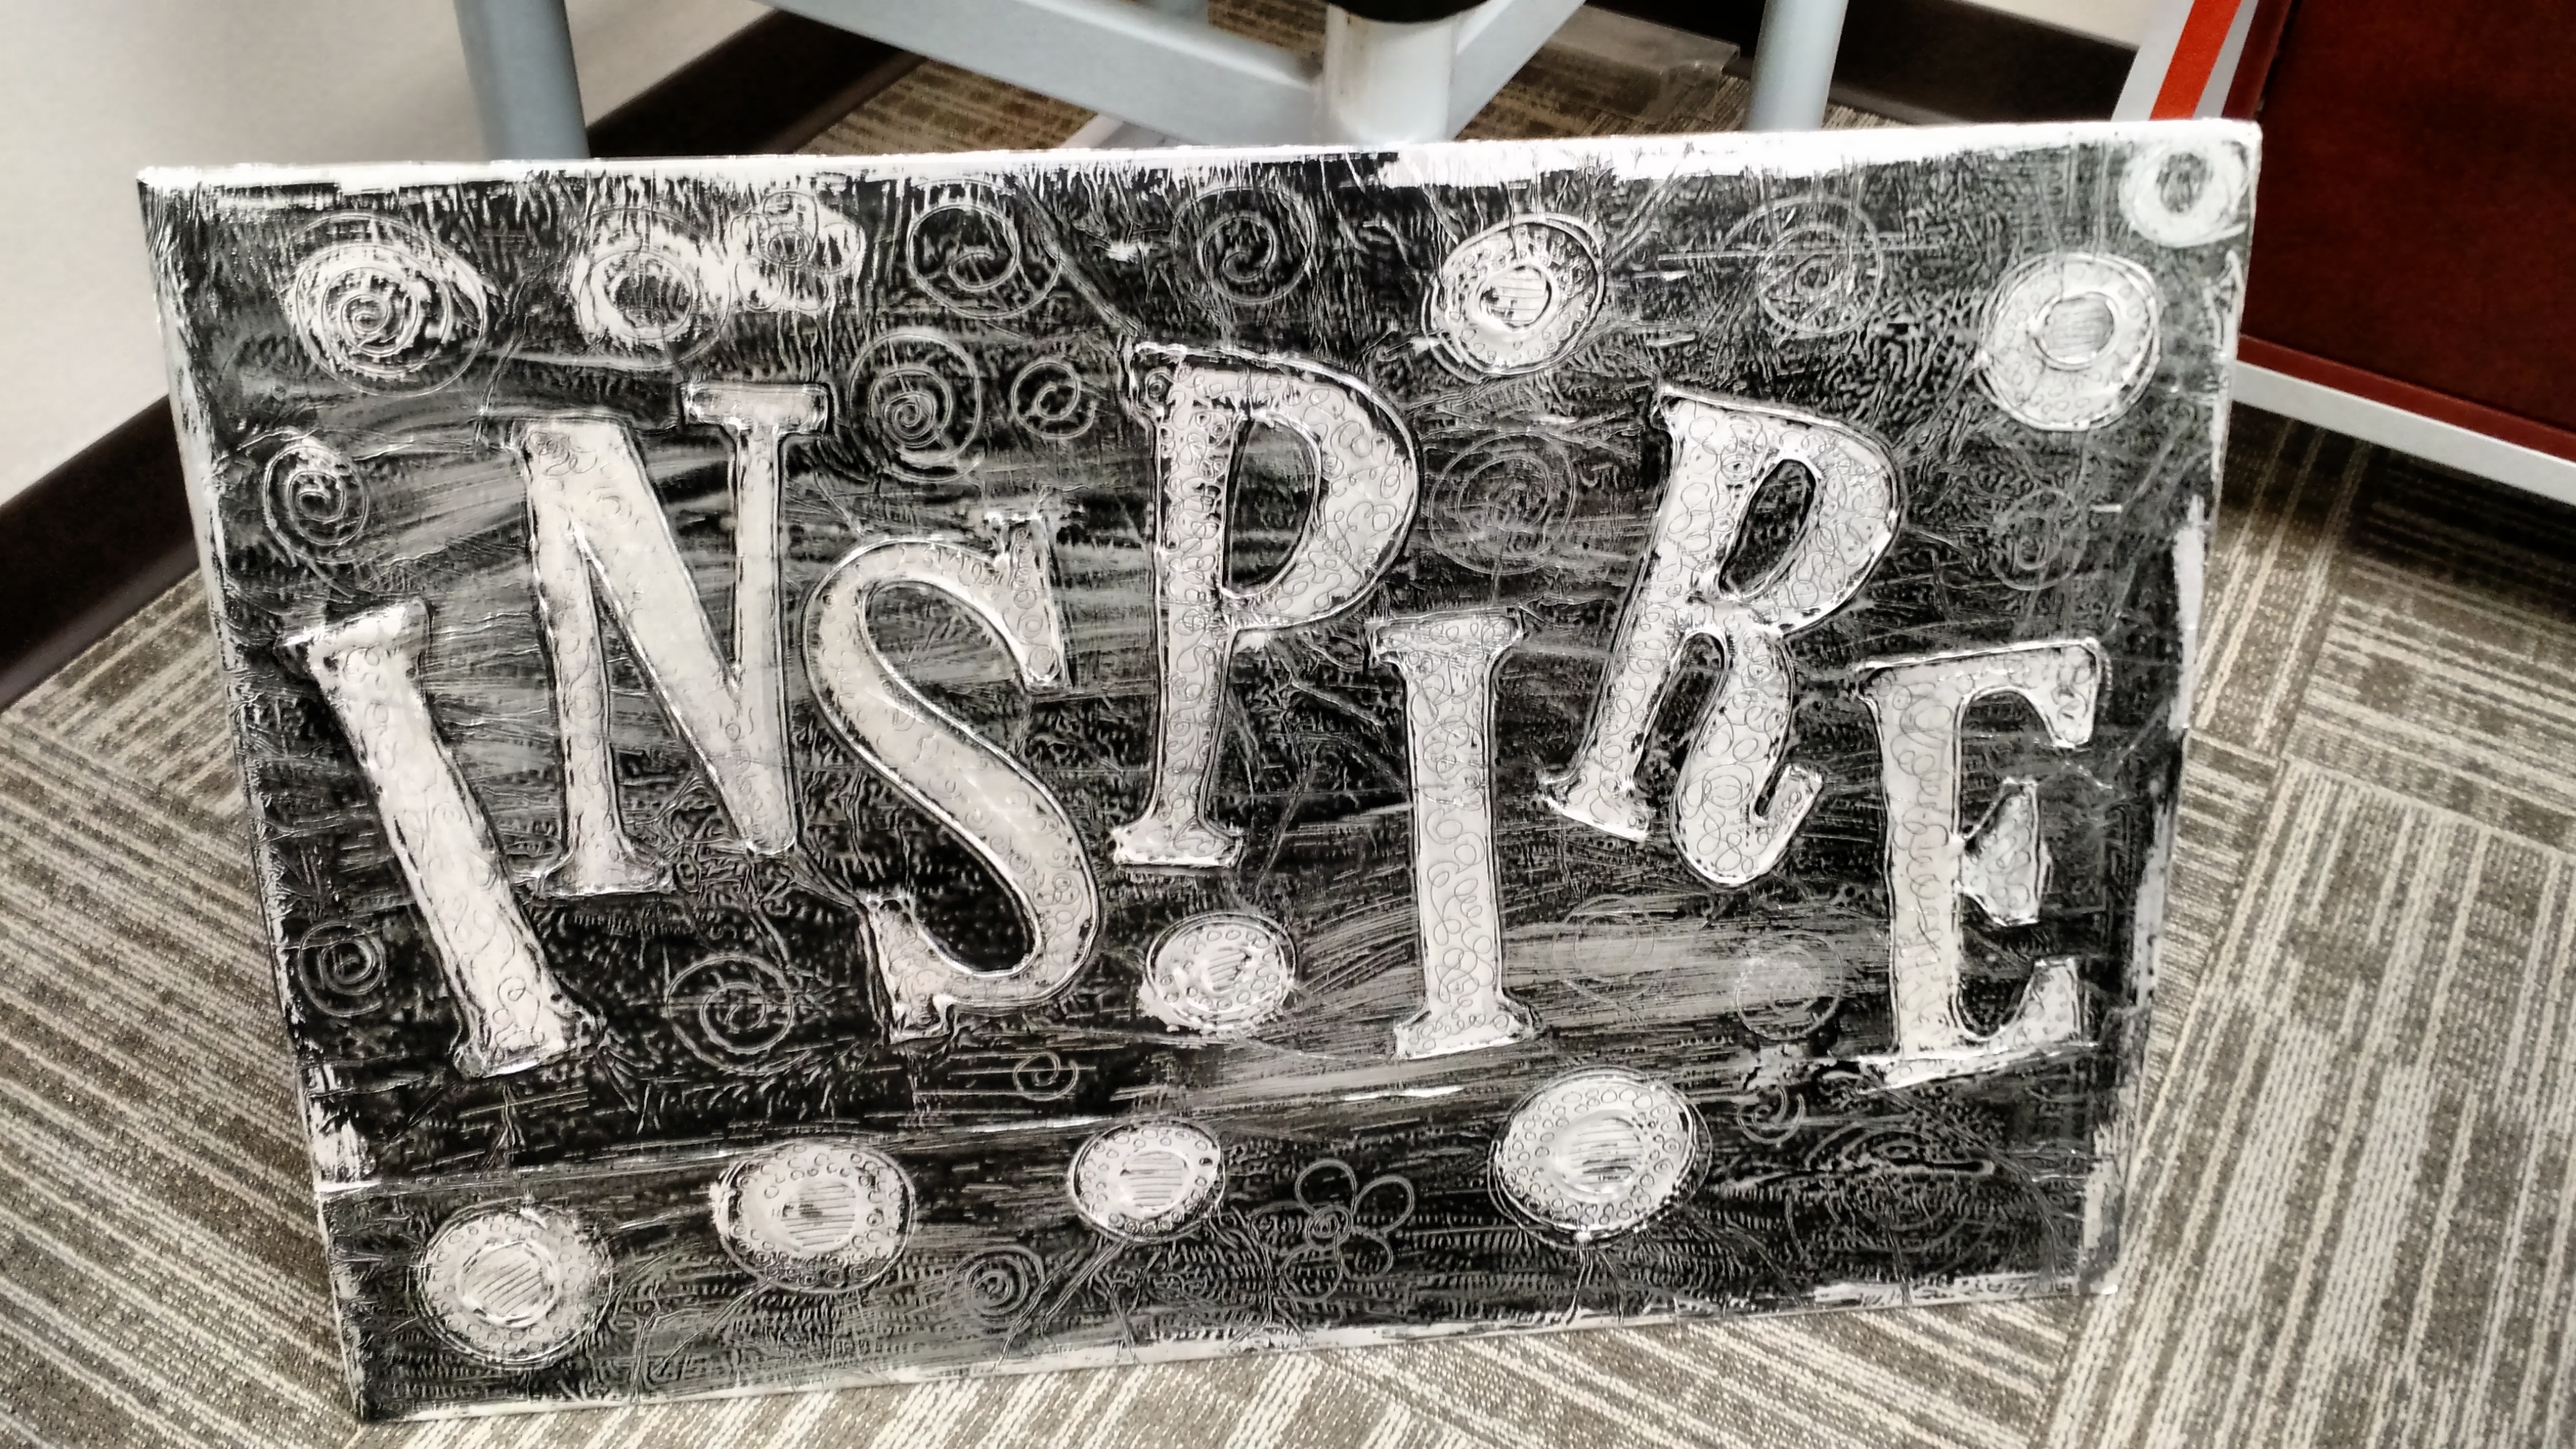
I added some bling by gluing sequins on the corners. Then gave it a quick light coat of sealer spray, and that’s it! Simple as that!